How to Add Locations and Create a Hierarchy? Follow
Step 1: Log in to AutyFi
Start by logging into your AutyFi account. Enter your valid credentials and proceed to your dashboard.
Step 2: Adding Locations
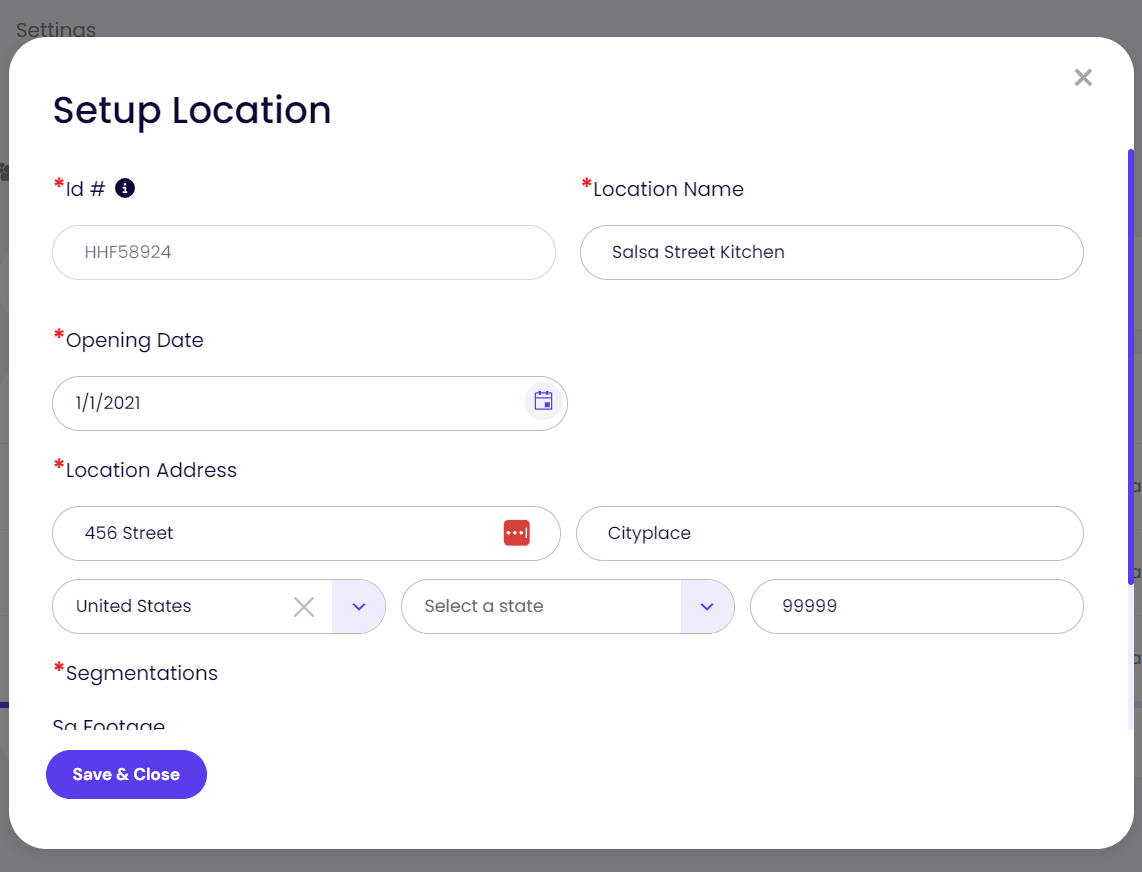
Add all your franchisees and business sites for accurate data management. Navigate to Organization -> Settings -> Locations. Click on Add Location and enter the details for each new site.
Remember, precision is critical. Ensure accurate entry of location details, including the name, address, and other relevant information.
Step 3: Control Access
Determine who can view and manage data for each location. Specify Access Permissions to control who can see and use the data. This feature helps maintain data security and integrity across your organization.
Remember to save your settings by clicking Save.
Step 4: Accessing the Hierarchy Management Page
Navigate to Organization -> Settings -> Hierarchy to set up your organization's hierarchy.
Step 5: Set Up Your Hierarchy
In the Hierarchy Settings section, choose the Areas and Franchises you want to manage. Assign roles and permissions based on responsibilities. Control data access and streamline workflows.
To prevent unauthorized access, carefully consider who needs access to what data. Review and update your hierarchy settings periodically to reflect any organizational changes.
Once done, click Save Changes to update your settings.
Congratulations! You have successfully added locations and set up the hierarchy in AutyFi. By following these steps, you're well on your way to improving efficiency and control in your organization. Keep exploring AutyFi for more features and capabilities.
Comments
0 comments
Article is closed for comments.